Art.nr. 7415706 / 7415698
The original bumpers for Sonett III MY 70-72 were made of a porous plastic material which over time absorbed water which caused the integrated steel rails and the studs to rust.
The Club has developed new bumpers made from solid hot vulcanized rubber with stainless M8 studs. The polished tool has a mass of 100 kg.
For manufacturing reasons they do not have an integrated rail but three extra studs (front) and reinforcements between two pairs of studs (rear) respectively.
Disclaimer! The material flow during the vulcanization process can cause minor surface imperfections. See picture. The Club does not accept these as cause for rejection or complaints.
The new bumpers are primarily intended for MY 70-72 but can also be fitted to MY73-74 but with additional work.

Front bumper MY70-72 Art.nr. 7415706
- After removing the original bumper, drill 3 new Ø 10 mm holes for the additional studs in the middle of the existing holes.
- Test fit the new bumper and enlarge the holes as required for the bumper to fit without being compressed. Rather to be in light tension.
- Fit large stainless washers to all studs and self locking Nyloc nuts. If the body is too thick or at the stays, use regular nuts with Loctite.
- It the bumper is fitted with the hood in situ, tool access can be improved by raising the headlights and removing the grille.
Rear bumper MY70-72 Art.nr. 7415698
- Remove part of the luggage compartment panels and drop down the rear exhaust system as required for access to all six nuts for the old bumper.
- The new bumper has M8 studs instead of UNC ¼” (6,3 mm) meaning that the old holes might have to be enlarged and in the direction giving a light pretension to the bumper .
- Fit the new bumper with large washers on all studs and Nyloc nuts. In case the body is too thick or at the stays, ordinary nuts and Loctite can be used.
- Refit the exhaust and the luggage compartment panels.
Front bumper MY73-74 Art.nr. 7415706
- Remove the old bumper without removing the rectangular tube brackets since they also support the hood.
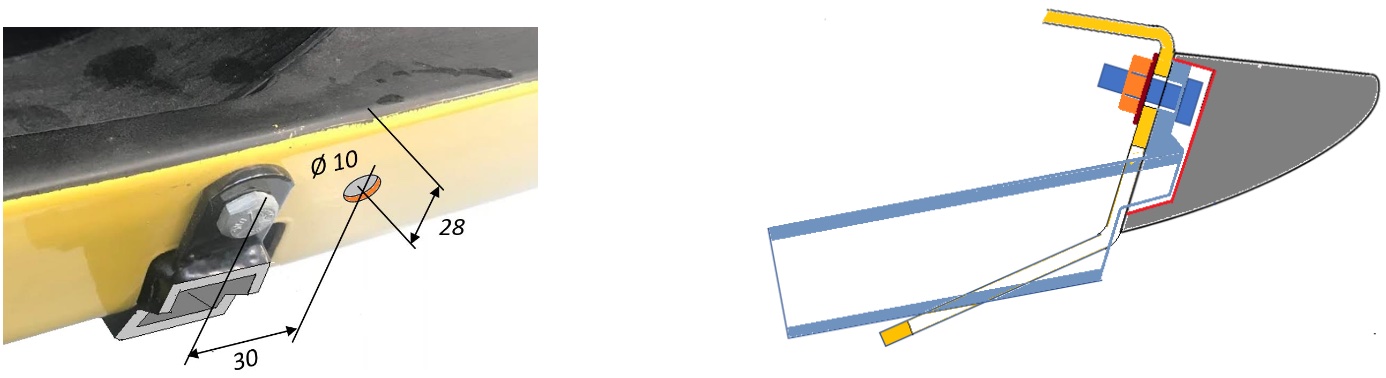
- Cut the brackets level with the weld and remove additional material according to the figures.
- Hold the bumper in light tension with the screws resting on the lower face of grille aperture and mark their lateral positions on a masking tape. Drill 7 Ø 10 mm holes 28 mm below the aperture edge .
- Grind out rubber from the bumper with a coarse rotating file until it fits over the cut down brackets. There are reference markings on the bumper 30 mm inside of the studs. If required, grind off material on the top of the screw lug.
- Proceed according to the MY70-72 instructions.
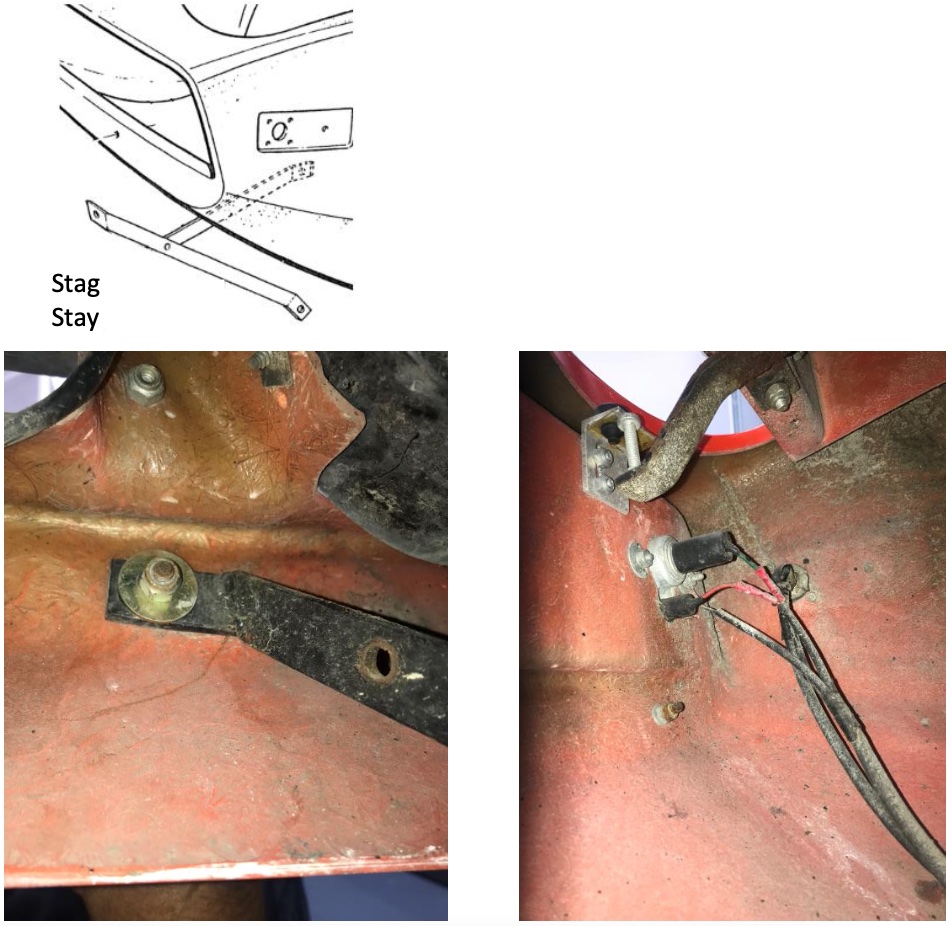
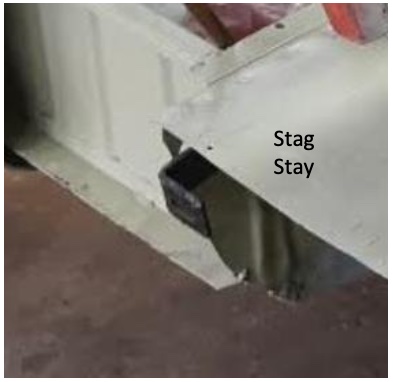
Rear bumper MY73-74 Art.nr. 7415698
- Remove the original bumper but leave the brackets in place since they can not be extracted through the body. They also have a function to support the body.
- Cut off the brackets level with the body taking care not to damage the visible body surface. Seal the body aperture with duct tape.
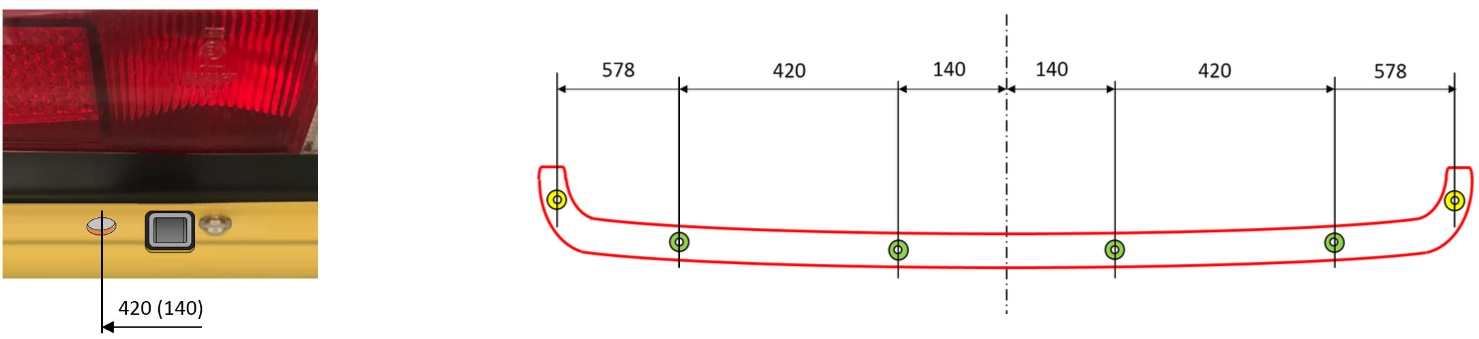
- Mark the body centerline in the middle of the brackets. Drill the 4 green marked holes (Ø 10 mm) in the middle of the raised 45 mm wide body section.
- Test fit the bumper and mark the positions for yellow holes (approx 578 mm from the centerline). This is to have the correct height position. Drill Ø 10 mm.
- Grind out rubber from the bumper with a coarse rotating file until it fits over bracket screw head. There are reference markings on the bumper 75 mm inside of the studs ”420”.
- Proceed according to the MY70-72 instructions.